Sunday, February 24, 2013

The Inaugural Wakefield Icebreaker

Camera Roll-39
Fat road.
Its late February, as you likely know, and that means what it always means: its time to get some miles in on the road, one way or another. Today's way broke with tradition: we drove to Wakefield to ride the good stuff, the snow roads. Iain, Marcel, and Robbi-from-the-internet gathered at Pipolinka, obviously, to kick off the ride.
Camera Roll-10
Ahhh, home away from home, Pipolinka. Is the coffee a-flowin? You bet it is! Vegan choc-chip ginger muffin to boot!
Camera Roll-9
Robbi, Marcel, Iain. Matt behind the ol' SLR, i.e., iPhone 4S.
Camera Roll-8
We remembered our bikes....phewf. Robbi's mtb was smaller.
Camera Roll-11
Obligatory covered bridge shot. Marcel, on the way out.
Camera Roll-16
Its tough riding packed snow on a fat bike with 20psi. Huge difference versus 5psi.
Camera Roll-17
Our foray up an unplowed road from the bridge was ok for the fatties, but not Robbi's regular mtb. Back down to try another link up to the 366. That one was also ok for us; Robbi had a solid hike.
Camera Roll-14
Marcel cleared the bank too, ready for the next challenge.
Camera Roll-41
Marcel rolled on a Larry and Endomorph, ideal tires for the snow roads, which were quite hard-packed, idea, really. With a temp above zero, some sections were quite wet. Under zero, they'd be perfect.
Camera Roll-35
First ride of the season on the open roads, you gotta stay on top of eating. You don't want to bonk out there.
Camera Roll-34
Wrong turn, good for a pic.
Camera Roll-32
All-day pace....except up Woodsmoke! Here we pass through the Wakefields.
Camera Roll-23
Staying dry(ish) required staying on the snow.
Camera Roll-43
Heading back into town, after about 3:20 out on the roads, and 55k.
Camera Roll-45
Well earned coffee and smoothies at La Foret, a brilliant compliment to Pipolinka, just next door.


The verdict? Amazing ride. We've talked about trying the roads in the winter before, but never driven up to try. Riding from home and back is 80k, so that would be the whole ride, and a wet, flat one. Driving up to Wakefield puts you right in the good terrain and salt-free snow covered dirt roads, away from traffic and spray, as long as its below zero. The fat bike is extremely stable on this sort of surface, and shockingly efficient with 20lbs pressure in the tires, even aggressive Surly Nates. Yes, climbing roads that are tough on the best of days are yet tougher on a 26-35lb bike, but the traction is good, and there is no pressure to hit a PB. Its all about putting in some beautiful hours on the bikes with good company. I can't think of a better way to build the fitness required for the challenges spring brings.

Next winter we'll get up to the Wakefields to ride more often. If there is interest, we'll put together a group ride or two. Between -10 and 0, it won't be hard to stay comfortable out there, especially with wind buddies!

Tuesday, February 19, 2013

Understanding the Cyborg Cyclist


P1030126
Ryan Atkins atop his Steelwool in a pretty serious stage race.
Jan Heine talks about 'planing' without saying the word in his latest blog post. The human body is a dynamic 'motor' upon a bicycle. The way the machine receives power feeds back into the source of the power, UNLIKE the manner in which an engine delivers power to a drive train  Engines don't tire; they run out of fuel. In my view, this is the fundamental misconception that large bicycle companies perpetuate in their marketing copy espousing the structural design of their products. They lead consumers to believe that the most efficient bicycle system is the one that deflects the least under pedaling load. They use test apparata to quantify their claims. Riders are thus conditioned brainwashed into believing that the stiffest platform is the fastest platform.The paradoxical thing is that in the end, the prophesy might be self-fulfilling.

Humans tire; the question is: how fast? Heine discusses his findings: stiffer and lighter bikes are not faster by virtue of these factors. Rather, they seem to fatigue the rider sooner (due to lack of yielding to the power input), reducing the overall power available for propulsion. Heine thus tacitly references planing. The titanium bike in his experiment does not harmonize with his body's pedaling rhythm, but instead loads his legs with lactic acid prematurely. He is not able to produce as much power on the lighter, stiffer bike. This is thus a slower bike than its heavier steel counterpart.

One might blame perceptual bias, but I suspect Heine's protocols are sound. Heine and his co-tester, Mark, ride steel bikes a lot. They are attuned to the rhythm and resonance of 'flexy fliers.' They know how to work with them. The both believe they are fast bikes, and prove it by riding them fast. On stiffer bikes they are less efficient. At the same time, riders who have grown up riding stiff bikes believe they are faster. These riders are attuned to the resonance of stiff bikes, and feel slower on bikes that yield more to their input. Feeling slower can mean you are slower; the rider's perception of speed versus effort can either enhance or diminish one's power output. That is, if you feel like a hero, you can eke out more power. In contrast, if you feel like a 'zero,' access to your power will be diminished; you will undermine your ability. Cue the excuses.

In the final analysis, I would contend that the fastest bike for a given rider is that which harmonizes with the rider's belief and ability. PRO racers probably really are faster on ultra stiff bikes than they would be on lively steel rigs (it would be fascinating to involve PRO racers in the same experiment Heine undertook).

Rando masters like Jan Heine probably really are faster on flexy, heavier bikes. When you get down to the bottom of the matter, there is no one set of design parameters that is ideal for ALL riders. A great bike is one that the rider feels comfortable and fast on, regardless of how that is accomplished. If you want to change it up, you are going to have to be willing to take the time to get intimate with a new platform in order to get the most from it.

This said, 23mm tires really are slower than 25s on the road. ;)


Friday, February 15, 2013

Winter Fat Biking: What to Wear

Thursday night fatting.

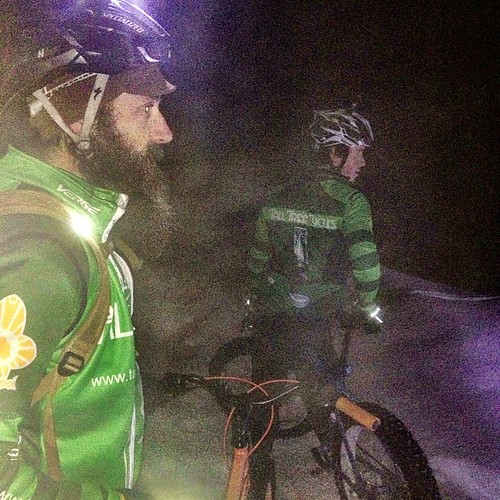
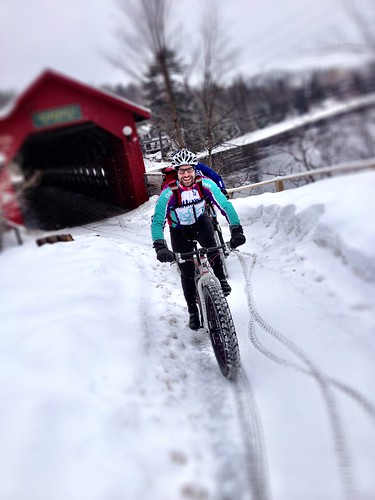
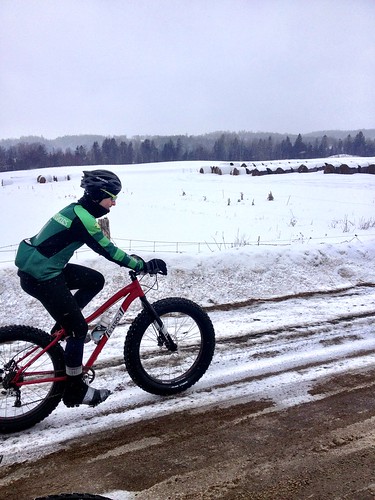
I've been meaning to write a post on dressing for fat biking in the cold for a while, so here it is. I welcome comments about what you all find works. I hope this helps orient those who are new at the whole cycling-in-the-freezing-cold thing.

If you live in Alaska, or anywhere else polar, you should refer to Fatbike.com for advice. Minus 40 degrees Celcius demands different gear than the Ottawa Valley and other similar climes. Here, winter kicks in somewhere between November and December. It has been pretty variable over the last decade or so. Consistent temperatures below freezing tend to begin in late November, if not early December. At the coldest, we get down to about -35 degrees Celcius on occasion, but a typical 'cold' day is about -25 Celcius. Those days have not been terribly frequent over the last few years, with this year as an exception. I rode to work one day at -32...not pleasant.

If you are new to riding in the winter, you will have to start with your hands and feet. While many in very cold climes opt to use thick boots and platform pedals to get the power down, that set-up has tradeoffs. Likewise for clipless shoes or boots. If you will be riding actual singletrack trails, you might like the added control clipping affords. I can attest that switching from platforms to clipless last season made a noticeable difference in control. The challenge is now staying warm.

Only -12ish on the bike today; quote tolerable.

Lets establish a few principles:

- You can be dry and warm or wet and warm; take your pick, depending on:
--- how long you are going to ride
----- if for only 1 hour or so, close to a car or warm house, you don't need to worry too much about being wet.
----- if you are going out for longer than an hour or so, and/or won't be very close to a warm space, you will want to stay drier. If you get all worked up and wet, then have to ride home on a windy road, you will suffer. OR, you can opt to be wet and keep it in. This is the 'garbage bag method,' used by some endurance fat bikers. You trap in the heat and moisture with plastic, then cover that with insulation. As long as you don't stop for too long, you're good. I don't think this approach makes sense for us Ottawa-area riders doing 1-4 hour rides.

- Layer.
-- Thin layers out of breathable fabrics against the skin, insulating layers as you move out, then windblocking layer on the outside for exposure to wind. In the woods, at low speeds, windblocking layers are not always required. Try a vest over a couple layers to allow the arms to vent excess heat. Keep a shell in your pocket or pack to retain heat once your intensity goes down. That might be the end of the ride, as you are about to drive off, or perhaps at a point where you will be exposed to greater wind and speed for a long descent or road ride home.

- Don't be warm before you start moving.
-- You should not feel toasty in your riding gear while you are standing outside, stationary. If you are comfy, you are overdressed for riding. Lose a layer.
---- If your effort level will be pretty constant for your whole ride, and conditions are expected to remain consistent, you won't need to worry much about changing your layer; assuming you get it right to start with.

- Wool.
-- Specifically, merino epic wool, from a source that treats their sheep with respect.
---- Thin base layers against the skin work really well to regulate your core temperature. High quality merino socks work well too. Merino skull caps and neck buffs likewise work well in most conditions.

- Silk.
-- For glove liners, silk seems to work better than merino for regulating temperature and moisture. Some use it for base layers; I don't have any, so I can't testify to that.

- Cashmere.
-- I am not advocating cashmere in general (being opposed to the subjugation of animals). However, like Iain, you might have a sweater or vest hanging around. According to Iain, it works incredibly well as a mid-layer. Repurposing old pieces is better than buying anything new, in ecological terms, which for some, are also ethical terms.

- Neoprene for wet.
-- If you are going to be wet for a while, you will be cold if your energy output is not really high. You need neoprene.
---- Use neoprene gloves to trap water and keep it warm, as in wetsuits.
---- Use a neoprene face mask when you have to cover up. They have holes in them for CO2 and vapour to pass through.
---- Neoprene socks actually work pretty well too.
---- Some shoe covers are neoprene. They are ok.

- Oversize.
-- Shoes/boots, to fit larger socks with room to spare. You need some air space in the system.
-- The same applies for gloves and mitts; don't make them tight.

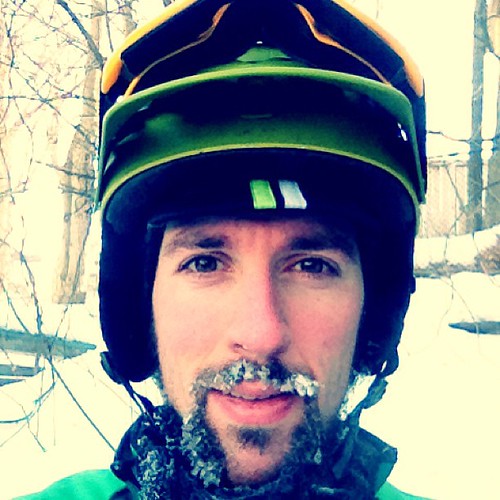
Goggles over your eyes when its cold.
-- Eyes and skin around the eyes are sensitive. Cover up with goggles on the cold days, and you'll feel much warmer overall, and protect your eyes from branches and attack squirrels.
---- Look for models with nose and upper cheek coverage, this makes a big difference.

- Bring spare stuff.
-- When the weather is changing, and/or your speed and/or pace will change frequently.
-- Along with clothes, bring:
---- spare socks if there is danger of a soaker,
---- an emergency blanket and chemical warmers if there is a chance of an injury in an exposed or remote(ish) area.
---- enough water and food to cover a bit more time out than planned, if not close to home.
---- a multi-tool, glueless patches, a pump, a master link for your chain, and a tube.
---- Its good to have a cell phone.

There are a variety of offerings out there labeled 'winter cycling shoes/boots.' I have a pair of Shimanos, which are GoreTex. I primarily purchased these for fall and spring riding and racing, but pressed them into service for fat biking. While they make riding clipless possible, they don't make it warm. I use a pair of Superfeet 'insulated' insoles to bump up the warmth, and sized them large enough for thicker than usual socks; ski socks fit. However, if I'm out for longer than one hour in colder than -5, my feet will get cold. At -15, they'll be quite cold. -25? No go, I'll freeze, so I can't ride. Adding booties would bump up the heat a bit, but they tend to get mangled when you step off, so you have to resort to taping them to keep them in place. I use a pair of short gaiters to cover both the tops of my shoes and the cuffs of my Endura Singletrack pants.

The Endura pants are not waterproof, barely water resistant. Generally, that's not an issue; if its raining I'll ride inside. These afford enough space in the knee to fit in the 661 Kyle Strait knee pads I always wear. After nearly ripping my knee cap off on my first ever fat bike ride a couple years ago (on Brad's bike), I decided knee pads were essential. Rocks are hidden by snow, and knee-to-stem impacts are not uncommon. Better to be proactive.

Ski socks and a pair of knickers with chamois go on under the pads and pants. Rather than cinch the pants super tight, I use a pair of Chums suspenders, which work great.

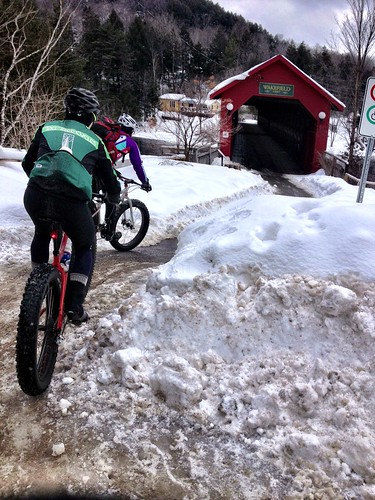
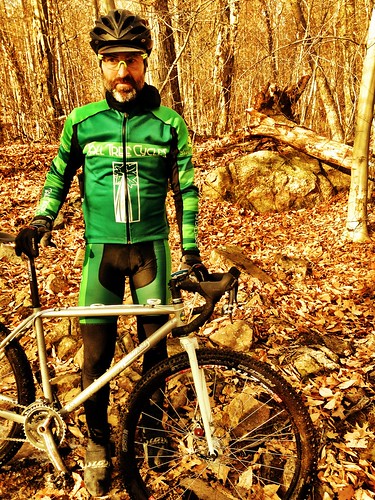
Up top I wear multiple merino layers, as outlined above. I'll often wear a poly-something long sleeve jersey on to of 1-3 base layers, then either a jacket or thick vest over that; our Tall Tree team kit works well. Its all fine tuning, depending on the weather and where I'll be riding. In Kanata Lakes I always layer for more breathability and less windstopping than when I ride the local paths in the city. The intensity in Kanata is much higher, yet the speed lower and exposure to wind minimal. In contrast, riding the local paths is often quite windy, and about twice as fast (self-made windchill).

On my hands I wear a variety of gloves, from silk liners with WindStopper fleece gloves over top, to WindStoppers inside wind blocking lobsters, to my new Black Diamond Guide monster mitts, and about 63 other combinations in between. While bar mitts/pogies are practical for trekking-type riding, I don't consider them practical for singletrack, or anywhere else where crashing is expected. If your hands are always cold, and you don't grab trees or crash much, these could be for you.

On my head I either wear a merino scull cap or merino toque, depending on the cold. These are encased by a snowboard helmet with visor and goggle clip, perfect. Goggles are an old pair of Oakleys with an add-on shield.

I think that covers it, head to toe. Did I miss anything? Don't say chemical heaters, that's cheating!

Enjoy the snow, spring's on its way!


Monday, February 11, 2013

Winter Projects: SRAM overhaul and VTTs

Being winter and all, and an icy one at that, I've had some time to revive a slew of bike parts in the ol' man cave lately, which I quite enjoy. I thought I'd do a little post on what I've been up to.

First up, wrenching on SRAM road shifters with Muc-Off. I've used a set of Rival hand perches for 4 seasons, and they've served me well. However well protected the internals of SRAM shifters are compared to Shimano's offerings, the fact remains that lots of contamination finds its way inside over the course of all manner of riding, not least, cyclocross. Horrible? No. Deserving of attention? Certainly.

SRAM Rival, pre-disassembly

First, remove the hood from your shifter, off the bike. You need new cables and housing anyway, right? This is going to work way better if the shifter starts like this.

Lots of contamination present

See the filth? Nasty. That stuff is not good for the function and durability of your shifters. Remove this plate under my thumb with the proper small Phillips screwdriver. Don't lose the screws.

Clean!

Here's where the Muc-Off comes in. I didn't want to use a harsh solvent, so I took Muc-Off's terrific pink cleaner and diluted it in hot water in an old granola container. Go ahead, I've been called a 'granola' before. Whatever. Soak the shifter.

Grab your spouse's toothbrush and scrub away at the internals, removing all the contamination you can. Rinse, lather, repeat. Know that you are cleaning away some of the grease that is/was in there from the factory. This means you might well have to add some lube periodically. Know that.

Rinse with warm water. The Muc-Off is designed to come off this way. If you are paranoid about residue, flush it with rubbing alcohol.

Pick your poison.

As you can see from the photo of my tool chest, I have a lot of lube options. Muc-Off's lubes are great, but I've not been using them long enough to try one in my shifters. Instead, I used Tri-Flow, which is indispensable in the shop. It is not sticky, so it won't collect contamination. It's pretty durable too. Lube it up. Word of caution, if you have Muc-Off's ceramic lube (pink top), DO NOT use it for any parts with small moving parts. It gums up and restricts part function. It can be used on cables, where it is quite slick, and of course, chains. However, it collects a lot of debris, which then hinders performance. Its an odd one.

Ok, now you need to dry out the shifter. I use a compressor and blow-nozzle to blast air in, moisture and dirt out. If you don't have a compressor, air dry the part, then lube up all the moving bits and re-install the covering plate. You are now ready to re-install the hood and mount the shifter back onto your bike. If you are worried about getting the positioning right, tape the bar where the top of the shifter sits before you remove it, then line it up again.

Now you are ready for cabling. Remember, new cables and housing alone can make a tired bike feel fresh. Replace them at least once a season on a bike you ride regularly to maintain solid performance. Note that excess friction in the cables and housing loads makes your shifters work harder, and wear out faster. I will do a post specifically on cable and housing in the near future.

While your shifters would likely be going back onto your road or cyclo-cross bike, mine are now adorning my Velo-Tout-Terrain (VTT) machine. 'VTT' is what the French call 'mountain bikes,' and, with all honesty, that name is far more appropriate for our fat tire machines than 'MTB.' The truth is, the minority of mountain bikers ride mountains....ever. Hills, sure; mountains, not so much. Perhaps like the Beta versus VHS battle, the term 'All-terrain Bike' vied for supremacy back when I was a kid ripping around on a Sears POS (no, that does not denote 'point of sale'). The english-speaking fat tire crowd settled on MTB, and ATB died away. Meanwhile, in Europeland, VTT was the term that stuck.

Its a monster. Its an abomination. Its alive! Niner MCR in VTT mode.

Driving home from Battenkill last April, Iain and I decided he should convert his custom steel Waltworks hardtail to a 650b drop-bar rig. Why not try it? What to call it? We settled on VTT, because 'monstercross' just didn't apply; there is nothing cyclo-cross about the format. We're talking John Tomac -ripping-it-up-up-with-a-Tioga-disc-wheel style here, minus the disc wheel. See, Tomac was a phenom. He raced BMX at a high level as a kid, then raced both PRO road with Bob Roll on 7-11, and MTB for a few teams, perhaps most well known, Giant.


Iain's bike came out great, and he put in a few hundred kilometers on in over the fall. Since we both like to do long off-road rides, and the majority of trails in Gatineau Park that are open to bikes are wide open, we are keen on seeing how we make out on this platform. Cyclo-cross bikes handle a lot of the trails in the park, but since we both like to stay off the brakes, and we don't like flats and dented rims, working with a MTB platform and running drop bars will get us into a comfortable position with multiple hand-holds, out of the wind on the road sections we ride, and generally allow us to ride wherever we want, fast. 650b and 29er wheels lend themselves to this set-up, 650b being ideal for smaller riders.

My bike is a Niner MCR, which is a Reynolds 853 steel frame. I'm using an XTR crankset with two rings, SRAM X9 10 speed rear derailleur mated to the Rival shifters, and Avid BB7 Road mechanical disc brakes. I've mounted a short and shallow drop bar on the same stem I used with a riser, and its 2cm wider than usual. This gives me the same reach and drop I use on my cyclo-cross bike.

I'll use a variety of tires, but nothing extremely aggressive. The key to fast rolling tires with minimal tread will be the Stan's Flow EX rims I'll build up, which feature 25mm wide bead hooks, setting up the tires with more volume than usual. Rims are getting wider across most disciplines, and MTB and VTT are no exceptions, especially with the mainstreaming of tubeless tires. Look out for a future post specifically on this topic.

We'll be taking these bikes to D2R2, and we'll ride them during our own Double Cross too. Underbiking has its place, but we're pumped to ride these bikes a lot in 2013! Are we alone here, or are any of you intrigued? Would you like to convert an MTB you've got to a VTT? Drop in at Tall Tree Cycles; the guys can help.

Velo Tout Terrain!
Iain and his Waltworks.

Velo Tout Terrain!